05
2011The Great Kitchen Remodel: Stage 1
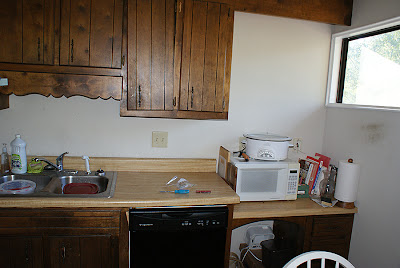
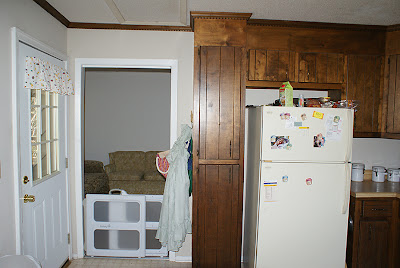
My kitchen was a cave.
Dark cabinets, super old fake wood laminate counter tops, dark dental molding all the way around the room, and dirty flat painted beige walls were sucking out the light from the 4 windows in the huge room. Here’s proof:
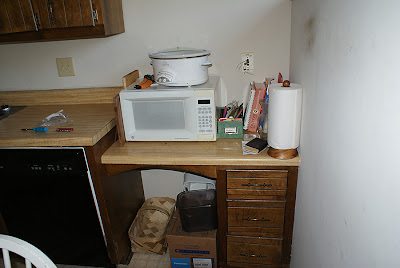
Additionally, there was this little desk in the corner that really served me no purpose. And the final straw was that no drawer in the whole kitchen was wide enough for a silverware sorter except for one of those desk drawers.
After we ripped out the wallpaper in the master, prepared the girl’s nursery, and spontaneously redid the guest bathroom, I set my sights on the kitchen. Our budget was (is) tiny so I knew we’d have to do work in stages. For Stage 1, I wanted the most visual change for the least amount of money (especially since midway through this process we found out about our Surprise Baby!).
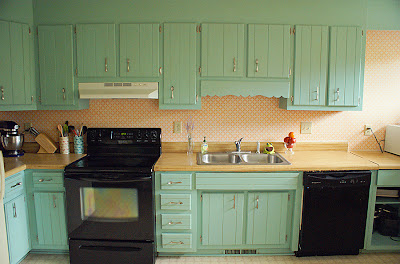
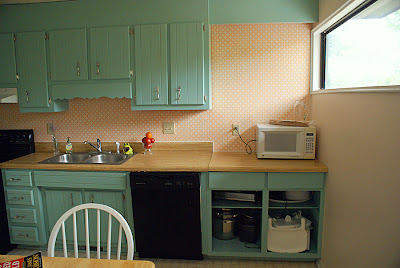
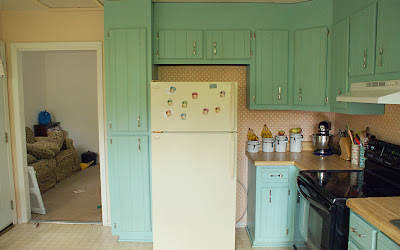
Can you believe that most of this change is paint?! I hardly recognize the space when I pulled out the before pictures!
Breakdown of costs:
Removal and Replacement of Desk: Free!
Derek pulled out the desk saving the fake wood counter-top. My father-in-law built the new cabinet using scrap wood and materials. The two of them attached a piece of wood to the back of the old counter top to make it as long as the rest of the counter tops and replaced it ontop of the new cabinet. Obviously it still needs doors… but right now everything down there is for the girls to play with 🙂
Primer, paint, glaze small rollers for the cabinets: approximately $60.
We used a gift card for the primer/supplies and only had to pay for the paint and glaze. All work was done ourselves.
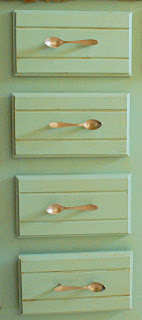
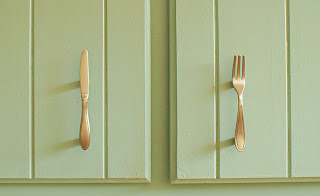
Whimsical fork, knife, and spoon pulls for the cabinet doors: Free!
They were a Christmas Gift from my parents!
New hinges for the Cabinet Doors to match pulls: approximately $15.
It would have cost more, but a couple sets of the hinges came with the pulls at Christmas 🙂
Paint for the walls: approximately $30.
That dirty beige flat paint sucked up paint like a sponge so we actually needed two cans. However, I bartered sewing skills for the second can of paint (thanks, Jessica!) and we ended up having enough in the second can to also paint my entryway. Bonus! 🙂
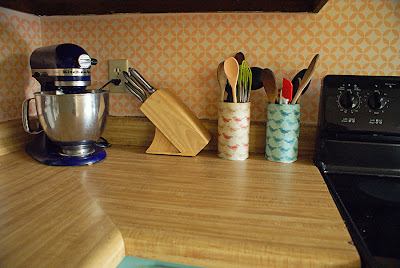
Stencil, brush, and acrylic paint for the back splash: approximately $35.
The stencil (found here) cost about $29 with a coupon code from an ad on The Nester’s blog. The brush and cheap acrylics made up for the rest of the price.
Cute bird containers: Free!
The containers are actually entertaining cookie tins that we’ve had since we got married and used for the same purpose of holding spoons and such. I had Mod Podge leftover from the girl’s bird art and the fabric is from the remnants of a dress I just finished. I have some more of this bird fabric and I’m debating between putting some on the bottom of kitchen towels or making hot pads. I may have enough for both…
Total Cost: $140
Stage 2 Plans include:
- New Curtains
- Doors for the Cabinet
- Replacing the Crown Molding we tore out in the whole room (should it be cabinet color… or white?)
- A Sturdy Shelf for the Microwave between the cabinets and wall (a built-in won’t fit above the stove)
- A Storage Bench for kiddos to sit on at the dinner table
- And I’m trying to talk Derek into letting me paint and stencil the linoleum since redoing the flooring is last on our to-do list. I don’t think I’m succeeding… but I can keep trying. 😉
- Oh, and eventually all our appliances will be black… we just don’t replace until they die. Though getting a new stove hood is pretty tempting… especially knowing how cheap they are.
And just a little recap:



Julia
Love, love LOVE the “after”! I’m sure when you enter your kitchen you breathe a breath of fresh air 🙂
ourextraordinarylife
Aww, so so cute! The magic of paint, it is such a wonderful thing. And I really love the hardware.
The Stephens Family
LOVE ALL THIS!! Definitely white crown molding to compliment the green instead of over powering it. I LOVE your kitchen!!! 🙂 and I love your family lol
andrea
I think the previos owners of your home were also the previous owners of mine LOL!!! Love your cozy re-do. I’m signing on, my icon is the chicken, hope you’ll stop by, too. Andrea @ townandprairie.blogspot.com
Chelsea
Love it! Love how the color of the paint shows off the details of the wood. Great job!
Christina
I love the drawer pulls! Amazing difference paint can make. Inspiring, maybe I should get a paint brush out…
Jessica
What a transformation! Nice work guys!
CW
Wow, amazing! I LOVE it! Makes me wanna be in your kitchen! :p