28
2013So I’m going to take a post just to brag on my Free Beginner Photography Class here at the halfway point of the class. Plus I really want each of them to hear and really see how much they’ve grown over the past few months. I’m really blessed by these 6 people who’ve participated almost weekly for the past half year and the seventh who just joined this weekend.
I’ll talk about each of these folks in alphabetical order. You’ll see one of the first images they posted for January’s assignment, then read the mission statement they’ve crafted for the Storytelling with Images Series, and finally see a sampling of their most recent work with some words of encouragement for me. Finally, we’ll have a little blurb about the itinerary for the next 6 months of this series.
Prepare to feast your eyes on the beauty this class is making.
Amanda
I want to capture raw emotional interactions between families and couples in a way that pulls away from the technicalities of a picture and pulls into one of the most important aspects of a memory: Love.
Amanda is a budding professional photographer that I’m privileged to know in real life. I’d met her in a few local photographer meetups before, but really got to know her in December when she hired me to do newborn photographs of Micah. Let me tell you something about Amanda: when she jumps into something, she’s all in! She’s spent more hours researching and practicing photography in the last month than I have spent in the past six months writing these posts. I was completely flattered that Amanda chose to jump into my beginner class at all!
Amanda, thank you for joining this class. Your knowledge and thoughtful critique has blessed the others so much. Your biggest areas of growth are white balance and lighting coupled with the passion of finding your voice. I’m so excited to see you create and begin to work toward your mission statement with your art. Keep challenging me as I teach and asking questions. And if you find yourself passionate enough to teach on a particular topic, I’d be honored to have you as a guest poster in this series!
Amber
I want to capture the beauty of this earth and the love, emotion, and every day interactions of my family and those around me.
Amber is one of my truest beginners. She only knew how to use auto mode when she jumped in at the beginning. The difference between her make-up image and the second image I’ve featured of her daughter Bri is incredible! The difference in lighting, intentional composition, emotion, angles… it’s huge!
Amber, you have grown so much through diligence and both giving and receiving critique. Your faithfulness despite your hard season with a 3 year old and infant is truly paying off. Your children will have beautifully recorded memories. I want to encourage you to get these memories into albums. Buy a template compatible with PSE and get on it. But most of all, thank you for sending me little words of encouragement through both Facebook and email. There were days when I pushed through writing a post when I really wanted to give up, all because I knew you were counting on it. Your words have made a difference in my life. Thank you.
Andrew
To capture beauty as the eye sees it, and as the imagination remembers it.
Andrew is my Father-in-Law and his primary subject with a camera has always been primarily birds with a secondary emphasis on anything in the created world. His desire to learn photography grew naturally from his passion for bird watching.
Andrew, I appreciate that you’ve joined this class. Most of all I appreciate the time I know you’re investing in this class both reading the post and writing critique for others. I know reading and writing are not things that come easily to you, but you’ve grown in both areas through this class. Way to go! I appreciate your honest critique whether you like an image or not. I also appreciate your dedication in learning the craft even though it’s hard.
Jessica
I want to capture life in all its fullness and diversity. I want to encapsulate memories just as
they happened and capture the uniqueness of each individual.
Jessica is an in real life friend whose sweet husband surprised her with her SLR in February 🙂 She jumped in a little late and has caught up beautifully. So, like Amber, Jessica is a true beginner in the fullest sense. It seems every time I run into her around town, she has her camera strung over her should practicing while herding her four beautiful children.
Jessica, I’m loving watching your eye develop. Your biggest addition to this class is the overwhelming humility with which you receive and give critique. You’re eager to learn and grow and even I find that encouraging. As you’ve grown, I can see that you’re changing from a mom rushing to capture the moment to an intentional photographer mom with the patience to think about and compose a shot with intention. I love seeing that growth and am excited to see where December will find you.
SarahBeth

To capture everyday objects from a unique perspective and find the beauty in the mundane.
Right from the beginning of this class I could see that Sarah has an eye for detail. How cool are those rays streaming through the clouds on her very first submitted image. I find it amusing that her mission statement reveals this even more.
SarahBeth, I like the way you see the world. I like how you find beauty in the mundane and cause me to stop and stare at it in wonder. I need that so much in my season of life. Thank you for your encouragement to keep at the writing and assistance over the past few months. In the next six months, I’d love to see you push yourself to use the camera in places where you would ordinarily leave it at home: the theater, the movies, or just to document a mundane day. I love your vision and can’t wait to see you flesh it out.
Teddy

I want to capture and communicate the potential of what is now broken, and inspire others with ability to fix rather than throw away.
Or Isaiah 58:12 And they that shall be of thee shall build the old waste places; thou shalt raise up the foundations of many generations; and thou shalt be called The repairer of the breach, The restorer of paths to dwell in.
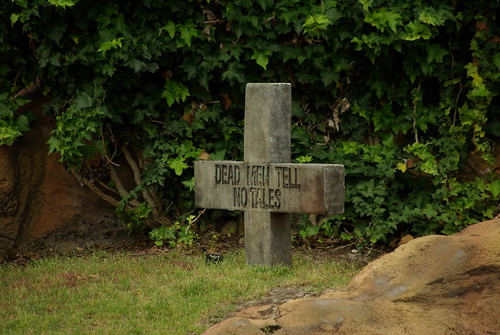
Teddy really might be teacher’s pet. Ha! :-p Early on he noticed a weakness in my ability to both photograph and write for posts while my toddlers fought through the winter season sicknesses so, he volunteered himself to take some of the images that I couldn’t at that time. That gesture made sure that this class had quality content as well as quality imagery. I’m so grateful. I also just love how this haunting last image totally fleshes out his mission statement.
Teddy, the first thing I’ve noticed about your imagery was that it was distinctive. I couldn’t really put into words at the beginning of the class why, but now that I had a chance to get to know your engineer brain, the thing that really makes you stand out might just be your precision. Part of that is that your subjects are most often still life or landscape. But even if you were able to photograph people on a regular basis, I imagine you critically looking at every aspect of the image you want to create and analyzing every last iota. I’d love to see what you could do through fine art portraiture with that brain of yours (although I’m not sure it would appeal to you with your mission statement). Thank you for being generous with your abilities and investing in me and this class. But mostly, thank you for always raising the bar. For jumping in and really critiquing whenever you had the chance to do so. For pushing and encouraging me and others to continually critique and grow. Your sort of like the class glue (in the most flattering way possible) 🙂
Theresa
Welcome, Theresa! Thanks for having the courage to jump in at the six month mark of the class and catching up. We look forward to helping you grow!
Free Beginner Photography Class Itinerary
So here’s what I’ve planned to cover in the next six months.
- 1 more post on lenses next week
- 3-5 weeks learning to use manual mode
- 1-2 posts on nailing focus in your images
- 4-8 posts on lighting (natural available light only with some mention of using reflectors and when to use your on-camera flash)
- 1 post on the difference between RAW and JPEG modes and when I recommend each
- 1 post helping class members to choose a final class portfolio project
- 1 overview post on the pros and cons of the most popular editing software
- 4-5 posts on very basic edits (brightness, contrast, levels/curves, healing/cloning, color/white balance adjustments, sharpening, and preparing for web)
- 1 post where users of different editing software will apply the same basic edits to one image with screenshots for the visual learners (Hopefully, Amanda and Teddy will help me out here)
- Remaining post days will have some step by step screen shot recipes for what I do to various images with editing software
- 1 Final post presenting the year end portfolio projects from class members
If you guys feel like there’s anything I missed on this planning list or if there’s something you’d really like covered, then please tell me in the comments section of this post or drop me an email to let me know.
21
2013Focal Length
Last week I threw around the term focal length a lot without defining it. The technical definition of focal length is beyond the comprehension of anyone whose not really engineer minded. If you’re really interested, here’s a wikipedia article. For our purposes, what we need to know is that focal length determines the angle of view; the longer the focal length, the smaller the angle of view and the more we have a sense of being “zoomed in” to the subject.
The focal length of lenses fall on a spectrum from super wide angle to telephoto. Wide angle lenses capture more of a scene while telephoto lenses zoom in to the capture only part of a scene. The spectrum runs from around 8mm (wide angle) to 5000mm+ (telephoto).
Here is a nearly full range of focal lengths used to take the same shot from the same location. This will give you a feel for how focal lengths affect the resulting image. All of these images are shot with a crop sensor so an 18mm lens is creating an image that would be more like what 24mm lens would on a full frame camera.
In the rest of this post we’re going to get into the nitty gritty of lens focal lengths, the distortion different focal lengths create, and when to use each focal length. We’ll start at the wide end of the spectrum and work our way to the telephoto end. I’ll also mention a few specialty lenses that can be creatively fun!
This following is a reference article, so feel free to skim over just the lens focal lengths that catch your eyes or that you already own.
Read More»14
2013This is a quick aside lesson that I didn’t plan for! As I started the focal length post on camera’s I realized that describing focal lengths is difficult because they’re affected by the size of your sensor. I’m used to describing things as if I were shooting full frame 35mm film so in next weeks post on focal lengths, I will be describing lenses that way.
The problem is all of us actively participating in this class (except for Amanda-lucky duck!) shoot on a crop sensor. So I’ll also include a sentence or two in parenthesis describing the difference on a crop sensor for those focal lengths most affected by a crop sensor in the following post. But for now, let me tell you the difference between crop and full frame sensors.
What is a Full Frame Sensor?
A full frame sensor is the same size as a 35mm piece of film.
If you’re a beginning photographer taking or observing this class, you most likely do not have a full frame camera. Full frame camera bodies (without a lens) cost upwards of $2300 (you might find a used one hovering around $1800). I do not own a full frame camera nor will I own one when my camera body upgrade arrives.
What is a Crop Sensor?
If a full frame sensor is the same size as a 35mm piece of film, then it follows that a crop sensor is ‘cropped’ or smaller than a 35mm piece of film.
At first this doesn’t seem like a big deal. Sure it’s a smaller sensor, so obviously the picture quality is not as great, but that doesn’t seem like a huge trade-off in regard to camera price.
The big deal is because lenses are built for a 35mm sensor/film the focal length plane has changed. So not only is the sensor sized cropped, but the actual image taken is cropped as well. A lot of this depends on a the ratio of the sensor size to a full frame sensor, but I’m not going to get that technical. The following is the short story.
Shooting with a Crop Sensor ‘Zooms’ the lens Focal Length
On average a crop sensor zooms or crops your frame around 15-25mm. This makes your focal length act as if it were 20-30mm longer than what the lens is labeled.
For instance, on a full frame camera a 50mm focal length lens is considered closest to what the human eye sees. 50mm is referred to as a normal lens for this reason. This is an image of taken by a 50mm on a full frame camera.
This is the same image from the same spot taken on a crop sensor also with a 50mm lens. The crop sensor appears to make the lens zoom in when in reality it’s just the smaller sensor size creating that affect.
Essentially, on a crop sensor a 50mm lens becomes a 75mm lens. So on a crop sensor, a “normal” lens is actually either a 30mm or a 35mm to account for how the crop sensor zooms in that 15-25mm.
Is that clear?
I know crop versus full frame sensor is an extremely ‘advanced’ concept in the photography world. But I totally felt that if I didn’t explain the difference before the focal length lesson that things would get confusing for all of us.
I may have confused you more… but what you really need to know is that when I describe a lens in the next post that you’ll need to mentally add 15-25mm to that lens to see what the effect will be on your crop sensor. So an ultra wide lens (as you’ll learn next week) will likely only be a wide angle lens on your crop sensor.
I also want you to hear now that some lenses will not work on a full frame sensor. They’re built for a crop sensor and will only work for a crop sensor. So if you have an inkling that one day you might like to work on a full frame sensor, then invest in lenses that work on both crop and full frame sensors.
***Much Thanks to Amanda for taking these quick snaps on her crop and full frame cameras so that you could visualize the difference!. 🙂
07
2013A Little Class Itinerary Note
We’re coming up on a half year of working through this class! I find that hard to believe!
I’m extending your Storytelling with Images “due date” until Friday, May 24th. Again, due dates are relative because this is totally a jump right in wherever you are sort of class. So jump right in. But I’ll be featuring all of my students again on Tuesday May 28th. So if you’d like to be featured then put your assignments into the Quiet Graces Free Beginner’s Photography Class Flickr Group on or before Friday, May 24th 🙂
There will be no assignments for the next three weeks to give you time to finish this super intense Storytelling with Images series. If you’ve finished all the assignments, go back and revisit the assignment that challenged you the most. I always enjoy redoing some of these key assignments.
For the next three weeks, we’ll have three short posts on Camera Lenses. All will be simply informative to give you time to finish up and to give me time to dive into writing June’s series on shooting in Manual Mode and another super secret writing project that has nothing to do with photography but will likely be announced the last week in May as well.
A few questions for you to answer in the comments as I plan/write manual mode lessons: How is program mode working for you? What has been hard about it for you? Have you got a good handle on using program mode and thinking about exposure compensation? Do you have any program mode questions before we dive into manual mode?
Any questions other questions, class? If so, jump into the comments. If not, let start getting a little information on lenses.
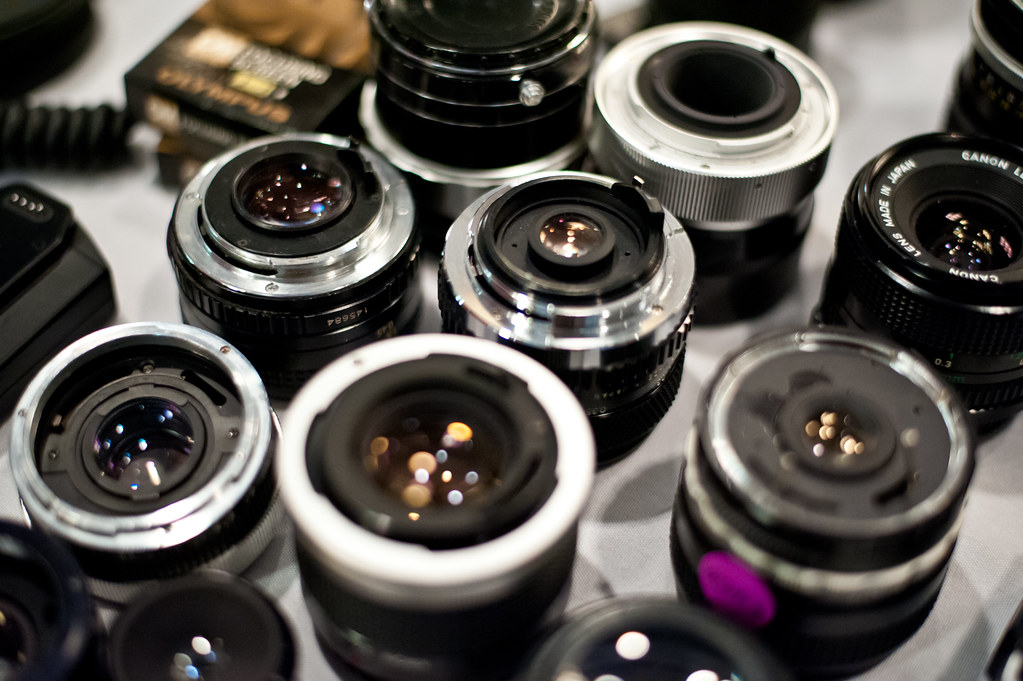
Image Courtesy KayOne73 on Flickr
What Are the Main Lens Types?
There are two different types of lenses on the market today: zoom lenses and fixed focal length (or prime) lenses. Most of us are familiar with zoom lenses since this is what usually comes installed within Point and Shoot Cameras or as part of a beginner DSLR kit. Yet, most beginner photographers are unaware of prime fixed focal length lenses. In this post I’ll define and do a pro/con comparison of zoom and prime lenses. I want you to know offhand that I am most definitely a prime lens girl, I’ll try to be unbiased in the pros and cons 🙂 Know that almost every photographer prefers one over the other and that it’s totally okay to do so!
Zoom Lenses
A zoom lens is probably the lens most find familiar. Almost all DSLR camera kits come with a zoom lens and most Point and Shoots are also equipped with zoom lenses. The photographer manually manipulates the lens to decide how much of the scene they will capture. On a DSLR you change the focal length by twisting the lens in and out. On a Point and Shoot, you usually have a button control that zooms in our out. We’ll define focal length a bit more in our next lesson, but for now know that the zoom lens has a variable focal length which changes the amount of the scene we can capture.
Pros of a Zoom Lens
- Able to capture a scene in multiple ways as you ‘zoom in’ closer to the action
- Can be used for work that requires multiple focal lengths without changing your lens. For instance, you can photograph both the just the bride and groom kissing as well as the entire wedding party without switching lenses.
- You don’t have to switch lenses for different situations. For instance, if your living room is small my 50mm might put me too close to your kids to capture both of them playing at the same time. Because I use prime/fixed focal lenses, I will have to switch lenses to capture both kids playing. While you, using a zoom lens, will just zoom out.
- Less gear to carry around your bag. A 18-55 or 70mm and a 70-200mm zoom will cover most any situation the average photographer comes. While in prime lenses I would need an 18mm, 35mm, 50mm, 85mm, 100mm, and 200mm lens to cover the same range!
- Carrying less gear means even if you buy quality fast f/2.8 zooms you might spend less than a prime lover whose goal is to cover the same range of focal lengths.
- In general, a zoom lens is typically cheaper than prime lenses unless you’re buying a quality fast f/2.8 zoom lens.
Cons of a Zoom Lens
- Heavy. I know a few wedding photographer friends who have developed carpal tunnel syndrome from carting around 70-200mm lenses.
- Things are not as sharply focused as a prime lens. Because they are more complicated to manufacture, zoom lenses often have a range that is most sharp. For instance on an 18-55mm lens, the 30-40mm range will most likely produce the sharpest images.
- Can be very expensive if you want a ‘fast’ lens with an aperture of f/2.8
- If they don’t have a higher aperture of f/2.8, you may find yourself needing to use flash in a darker building to both freeze the action or capture the scene.
- Tempt a photographer to stay in one place rather than move around to frame a shot because the photographer thinks “they can just zoom in.” This can stifle creativity if the photographer isn’t careful.
Fixed Focal Length Lenses (or Prime Lenses)
Prime lenses do not zoom. Using a prime lens is sort of like looking through a magnifying glass: to see the object closer you move the glass closer. With prime lenses you will “zoom with your feet.” At first, moving around to zoom is an unusual or inconvenient situation, but it also helps me to focus on getting the best composition. Some people love primes and some people hate them. It all depends on what and how you like to shoot.
Pros of Prime Lenses
- Lightweight. An 85mm prime lens is way lighter than the 70-200mm zoom that covers the 85mm range.
- Typically produce sharper images than their zoom counter parts.
- Primes are generally better for low light because their widest apertures are wider than zoom counterparts. You can purchase primes with apertures of f/1.2 and it’s hard to find a zoom with an aperture greater than f/2.8
- You can select a focal length specific to the subjects you enjoy most. If you want to photograph scenic vistas, you’ll be snatching up a prime in the 14-28mm range. If you photograph people, you’ll pick between a 50mm or 85mm lens. If you love macros, you’d grab a prime 60, 90, or 100mm macro. Specialty is a strong point with primes.
- You are forced to “zoom with your feet” with a prime lens. This can promote more creativity in image composition because you are unable to stay in one place and zoom in.
Cons of Prime Lenses
- Can be expensive. A prime lens with an aperture of f/2.8 or wider generally costs more than a ‘slower’ zoom lens.
- To cover the whole range that a zoom lens covers you’ll likely have to spend as much if not more than the cost of buying one quality fast f/2.8 zoom. Buying an 18mm, 35mm, and 50mm zoom lens with fast apertures will be way more expensive than a single 18-55mm f/2.8 zoom.
- Super fast primes of f/1.4 and f/1.2 are incredibly expensive.
- You’ll need to purchase and carry more prime lenses if you shoot a huge variety of subjects (macro insect shots, panoramic zoom scenes, and portraits for instance).
- You can’t zoom in without moving your body. This takes some getting used to… but it’s also a huge pro (see above).
How Do these Lens Types Apply to Point and Shoot Users?
If you’re using a point and shoot camera you could have either a Prime Lens or a Zoom lens just like the rest of us. But Point and Shoots get a little confusing because they may also have “Optical Zoom”.
Here’s the short story.
- Your camera has a prime lens if you don’t see the lens on the outside of your camera moving in and out as you zoom.
- Your camera has a zoom lens if you do see it moving in and out as you zoom in.
- If your camera has Optical Zoom that does not mean it has a zoom lens. It means your camera has the ability to crop your image before you release the shutter.
- My phone camera is a fixed focal length lens with optical zoom. My first digital point and shoot had a zoom lens that when you zoomed all the way in also had a “6x Optical zoom” feature that cropped the image in camera even more.
- When you enter the optical zoom zone of your camera, remember that your image quality is going down just as if you cropped the image afterward in photo editing software. So if possible, get closer to your subject rather than use optical zoom.
30
2013We’ve played around with the rule of thirds, leading lines, different angles, and shooting details, now lets bring it all together into a diptych and a triptych.
What is a Diptych and Triptych
A diptych is a pair of images and a triptych is a trio of images placed together to tell a story or make a comparison.
That’s a deceptively simple definition for a fun technique that when used properly can make twice (or three times) the storytelling impact of a single image. Choosing the two or three photographs to send the message you want the viewer to see is heart of creating diptychs and triptychs. The images can be of the same scene processed differently or at different moments in time (like a series of a diver entering the water or a child playing with a toy). Or the images can be of completely different scenes that combine to tell a story or communicate a message.
Examples and Analysis of Diptych and Triptych
I have fond memories of creating Diptych and Triptych for my photography 2 class in college. I tried to dig those out and had my husband scan the one I could find as well as created a few more.
I’m going to critique each set of images here by asking the following questions. This is also a good model for critiquing the resulting diptych/triptych in our Flickr Group.
- Are the images making a comparison, telling a story, or making a statement, or something else entirely?
- Verbalize the comparison/story/or statement this set of images makes.
- What could make this set of images stronger?
- What is really effective about this set of images?
Mountaintop Experiences
- Are the images making a comparison, telling a story, or making a statement, or something else entirely? I think this one from my film days (it’s not the greatest scan… but it’ll do) is just setting a scene.
- Verbalize the comparison/story/or statement this set of images makes. I think if I just saw the middle picture or even the two pictures on the right, you’d think she was just reading a book and eating a bag of chips with a pretty view. It’s the third photo with the rope and the pack that really sets the scene of a break from climbing.
- What could make this set of images stronger? I wish I’d had a wider angle lens to take this shot. But I’m pretty sure that there was no more than 10ft across the top of that precipice. It also would have been nicer had they lined up more directly, but again.. not a lot of room to maneuver (and there were at least 5 others up there with us). I think I stood in the same place for all three images.
- What is really effective about this set of images? I think it’s just an expanded view of a small event. I like how it just enlarges what your intial thought is looking at the images.
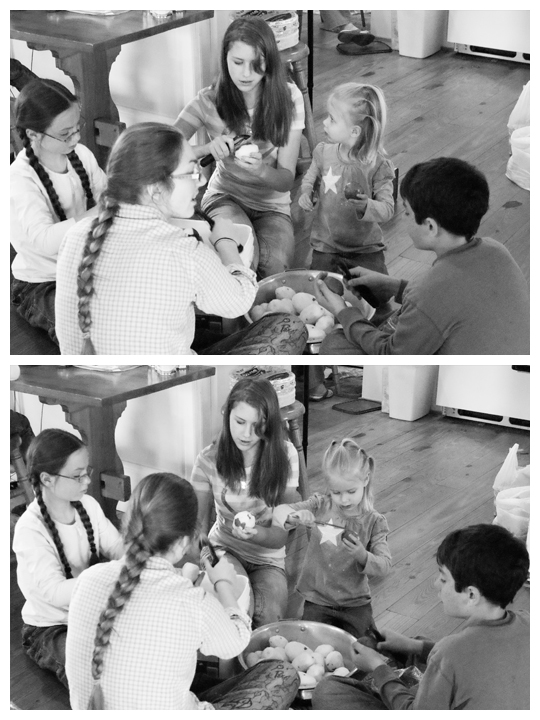
Pealing Potatoes
- Are the images making a comparison, telling a story, or making a statement, or something else entirely?
Making a statement. - Verbalize the comparison/story/or statement this set of images makes. When I took saw these two together, I was struck so much by how important it is for my little girls to have strong role models. The girls are watching everyone and modeling their actions even on the most mundane things. I put these two images together to help me visualize the importance of older girls/women in young girl’s lives.
- What could make this set of images stronger? I shot with a pretty wide depth of field (f/8) I wish I would have opened up a bit more (maybe f/3) to cut down the distraction of the backdrop. I also wish I would have been a bit closer to the subjects.
- What is really effective about this set of images? The confused look toward her role model followed by the determination to peal that potato. It’s her face that makes this strong. I also think the black and white processing helped to focus us on her face.
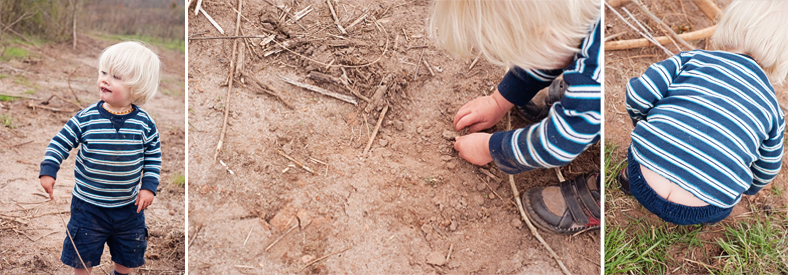
Boyhood
- Are the images making a comparison, telling a story, or making a statement, or something else entirely? I think they’re most effectively telling a story.
- Verbalize the comparison/story/or statement this set of images makes. One word. Boyhood. My girls are pretty tom-boyish, but they’re timid at first. Not Sedryn. Dirt, check. Stick, check. Pants falling off, who cares?
- What could make this set of images stronger? I’m not sure I like the way I have them arranged on this storyboard. I sort of want the two detail shot on the ends and the boy with his self satisfied dirty face in the middle. I also wish I’d taken them a bit later during his play when he was much messier.
- What is really effective about this set of images? It’s emotional for me. This boy setting out to conquer the world and starting out with the nearest patch of dirt. But it’s also so mundane. This is just what little boys do.
I had a good making a statement triptych that I couldn’t find to scan. An image of a pristine waterfall, a backhoe in a cleared field with a beautiful mountain view in the background, and a broken stop sign in a pick of trash. The statement was the need to keep some areas of the world pristine I wish you could see it… but I just wanted to give you an idea of how you can make a specific statement like that with your images in a triptych series.
Diptych and Triptych Assignment
Get out there and create 1 diptych and 1 triptych. Bonus points if you feel inspired to do more than one. In the resources section below, you’ll find some inspiration images as well as tutorials/helps for putting your three images in one frame. If you want to put them all in one frame, go for it. If that seems way too much work for you at this time, then just title all your images something like Diptych 1 and Diptych 2 so we know which goes with which.
When you post your images over in the Flickr Group, leave no description beyond maybe a title, and see what others take from your work in their critique comments. You could put the questions in the description if you wanted. After a few comments, feel free to add your own purpose/self-critique.
Comment on 2-5 (or more) of your fellow classmates Diptych/Triptych and answer the following questions in your critique:
- Are the images making a comparison, telling a story, or making a statement, or something else entirely?
- Verbalize the comparison/story/or statement this set of images makes.
- What could make this set of images stronger?
- What is really effective about this set of images?
Resources
Let me share a few extra resources as you create your diptych or triptych.
Inspirational Diptych or Triptych
Get your creative juices flowing by clicking any of the following links for inspiration.
Diptych Photography: The Art of Combining Two Images
Diptych & Triptych: 5 Prime Examples
Collections of Triptych Photography by Adde Adesokan
Triptych: When a Single Picture Won’t Do
How to Make a Diptych or Triptych in a Single Frame
You can use photo editing software to make a Diptych or Triptych in a Single Frame. Here are a few actions/tutorials for making collages in Photoshop Elements/Photoshop or Lightroom as well as a free software program that you could use to make your diptych and triptych.
Creating a Triptych in Lightroom (same technique would work for a diptych. I don’t have Lightroom… so you’re on your own for this one!)
A free PSE/PS action for a Diptych (One horizontal and one vertical image)
A free PSE/PS action for a Diptych (Two vertical images)
A Set of Free Actions including two Diptych (Two horizontal/two vertical… I use this whole set all the time!)
A free PSE/PS action for a Triptych (3 vertical images)
CollageIt (Free Program for creating collages on Windows or Mac. I have no experience with this… just thought it might be helpful if we didn’t have photo editing software.)
Please let us know in the comments if you know of another way to make simple collages for this assignment! Use links if you can.
I can’t wait to see what stories you tell with these!


