06
2013Side lighting can have a lot of variation. For the purpose of this class, I’m going to call this type of lighting anything that isn’t 80% or more front lit and anything that isn’t back lit. We could have light reaching only one side of the face and blocked completely by the features. Or we could have a minimum of side lighting where the image is still a little flat but is gaining some shadows.
Because of the huge range that side lighting covers, the effect can be very dramatic and mysterious to just hints of dimension by the shadows.. Of all lighting types, this one can be most harnessed for the effect you most desire. I’ve found that as I am able to control my light more after switching to continuous lighting, that I prefer the dimension created by side lighting. I like the contrast and depth in newborn portraits and I find myself hungering for this lighting in portraits of my own children. This may be my current obsession. I try to keep my light generally at a 45 degree angle. However, I want you to play with and enjoy this lighting type so feel free to experiment as I am now.
I think the most difficult part of side lighting is matching your images emotion and energy to your lighting. The first image in the case studies below is a great example. Her serious mud tasting expression coupled with the dramatic light across her face makes for lighting that really compliments the mood of the image. Had she be smiling, I don’t think this image would have been such a favorite for me. So the short lesson her is to look for side lighting that compliments your subject. I can see side lighting being really beautiful bringing out the texture in gorgeous architecture, so don’t think this is just a portrait type lighting. Experiment!
Side Lighting Case Studies
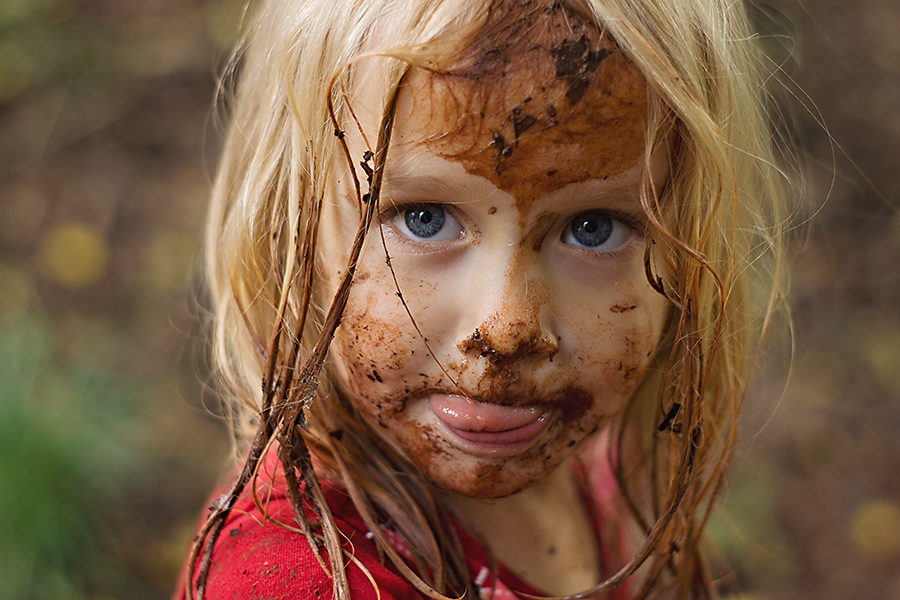
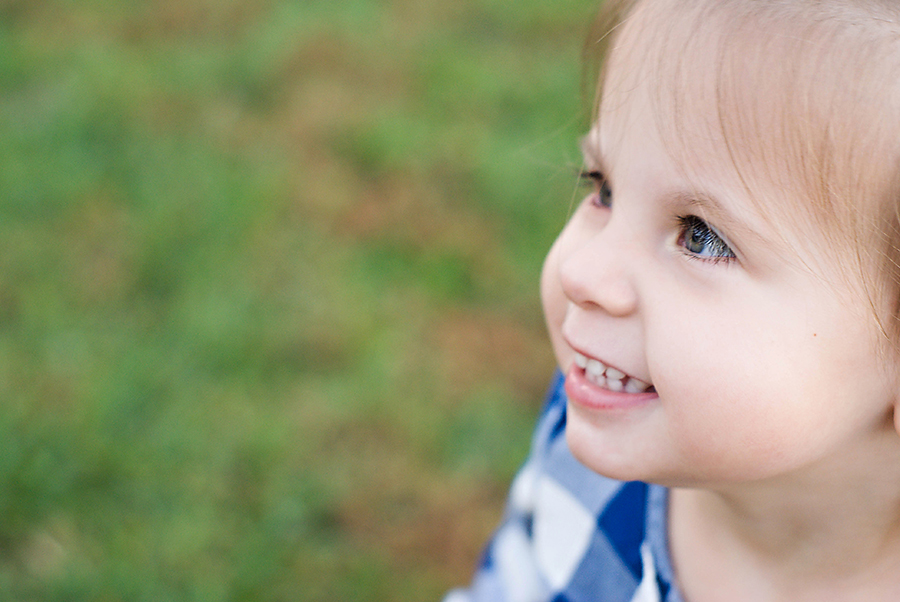
The light here is at almost a 90 degree angle to her face. Her brow and nose are shadowing the entire image right side of her face. This type of dramatic side lighting can be really fun to use.
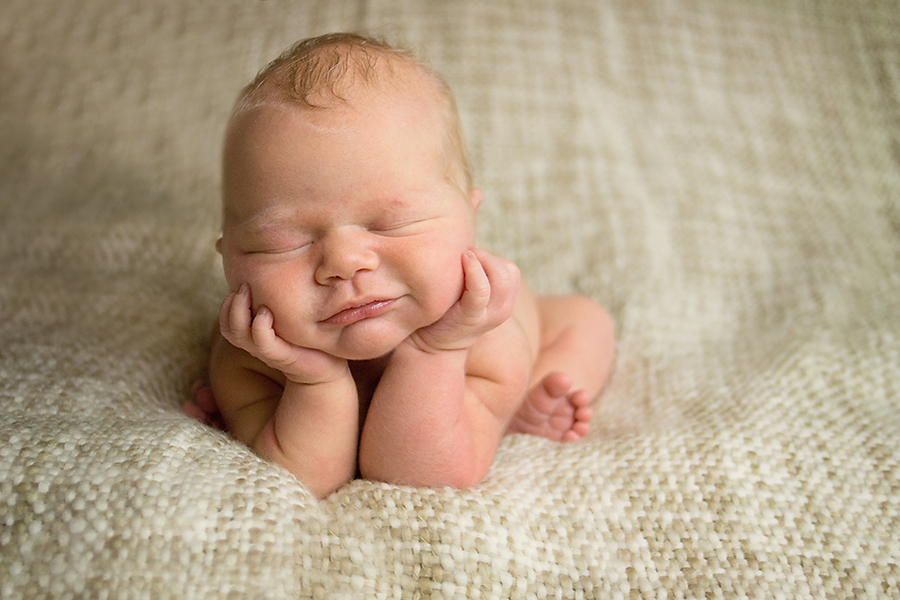
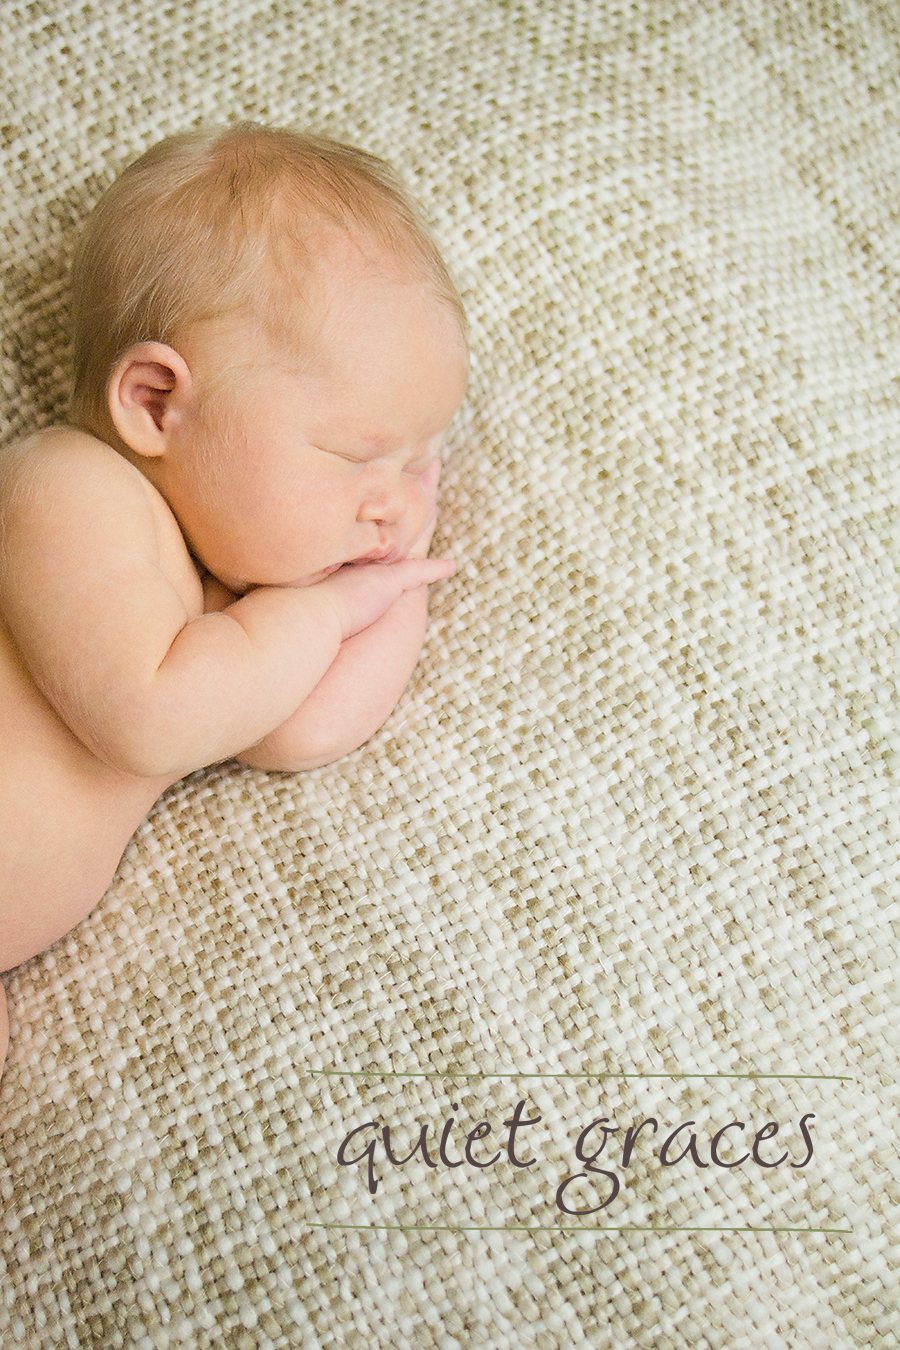
This is the 45 degree side lighting angle that I’ve become so fond of in my newborn portraiture. I love love love the drama this adds to the final image.
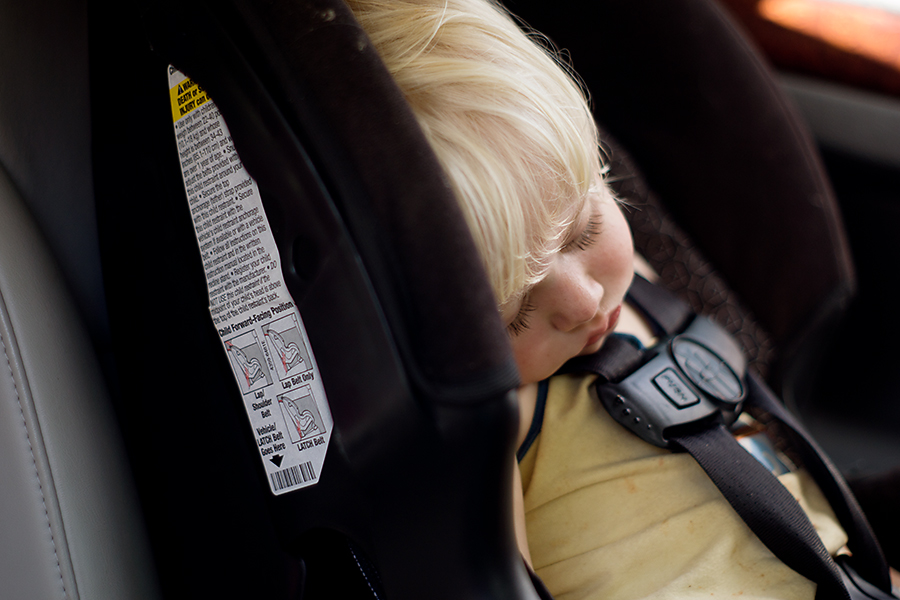
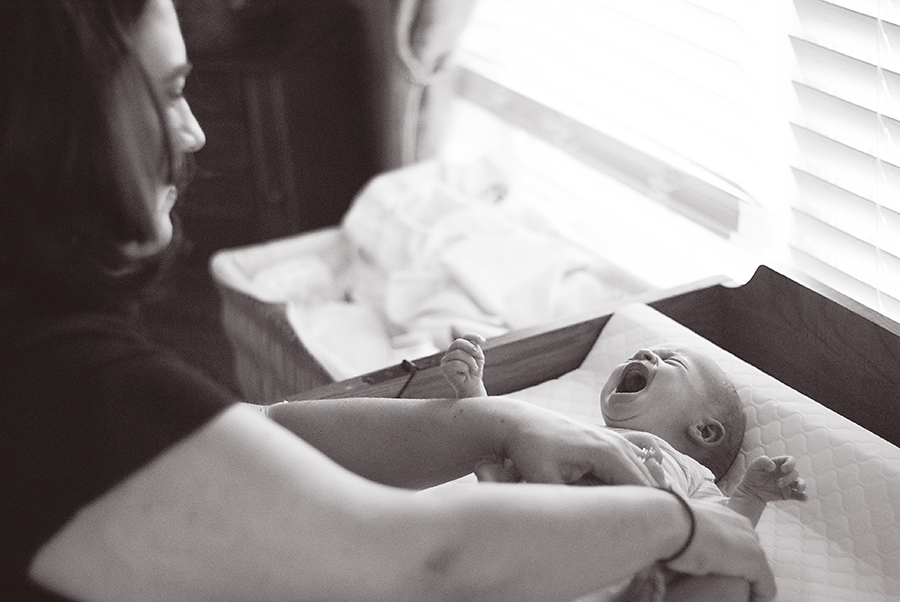
Available light from the window behind him is lighting up the far side of his face while the closer side is deep in shadows. I liked the side lighting here so much, that I actually took out my big camera just to snap this image. It’s beautiful and soft, but the shadows give such a rich depth.
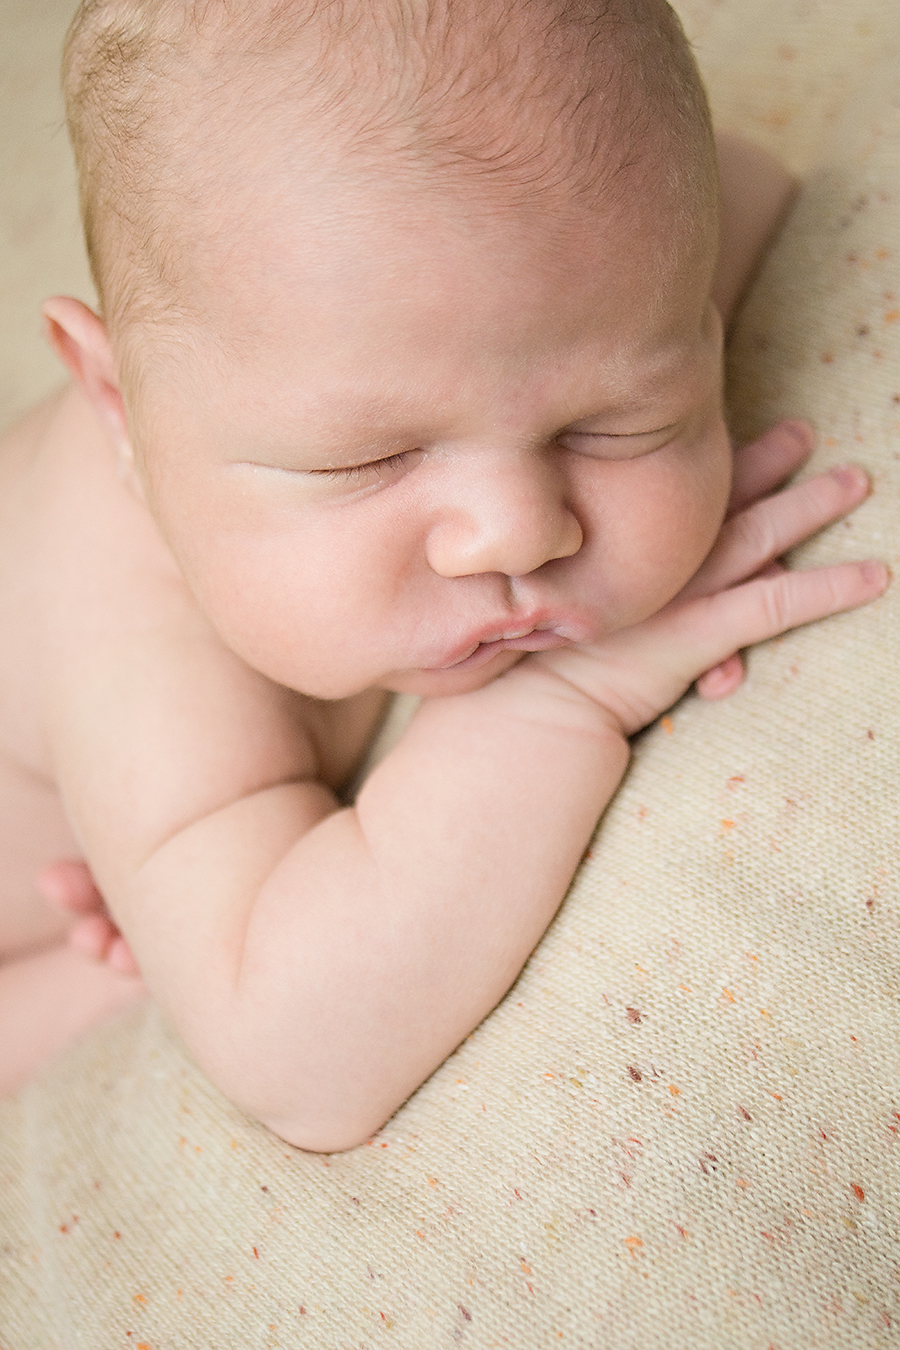
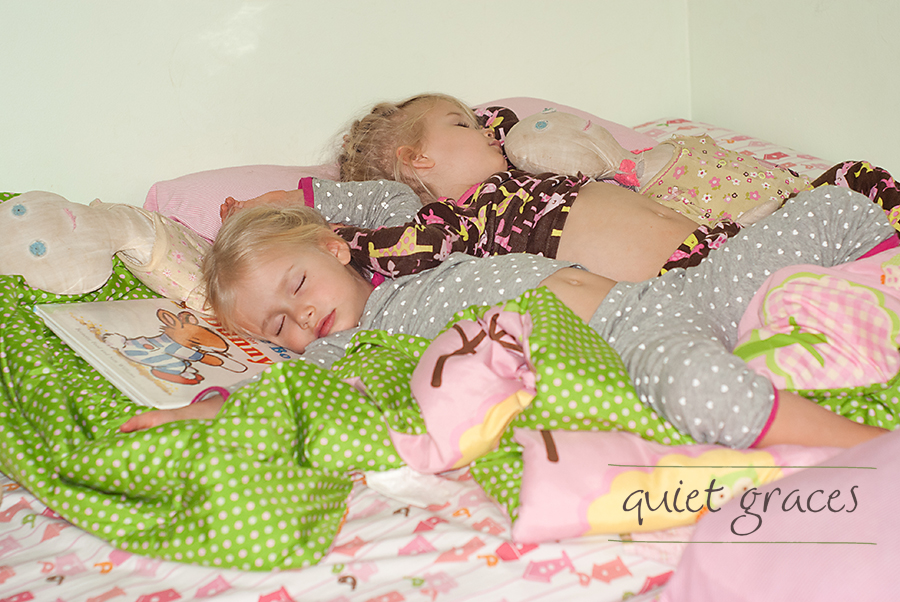
The side lighting here isn’t quite 45 degrees. I just can’t get over how much depth this lighting versus flat lighting creates for these little people. For me this means, I’m finally developing a style that I love 🙂
Assignment
Remember at the end of August I’ll be giving you an assignment to take imagery in a bunch of lighting types. You can start on this now or wait until I announce the assignment. September will be a no assignment month, giving everyone a bit of time to catch up.
30
2013I’m going to keep these specific angles (front, side, and back lighting) super short and sweet. Mainly because I don’t think a lot of words is going to accomplish a great deal. I will be pulling in as many images to illustrate the type of light that I’m talking about and draw just a few conclusions on where I think that lighting type is best utilized. Ready?
Front Lighting
Front lighting falls across the front of your subject. In portraiture, that’s usually the subject’s face.
Front lighting is often soft and flat which means it has very little shadows creating contrast.
I like front lighting with young or romantic subjects where I want a soft feel to the image and little drama.
However, front lighting’s danger is squinting! With your subject looking at a very bright light source, they will often squint 🙁
Here’s a quick look at some front lit imagery.
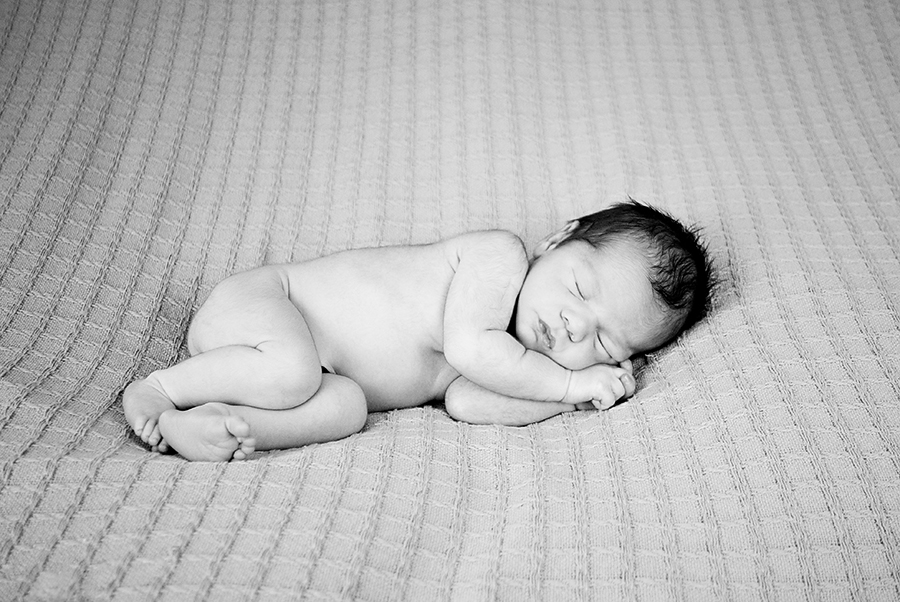
My lights were positioned on either side of me, producing a flat even light with little shadows except behind the baby.
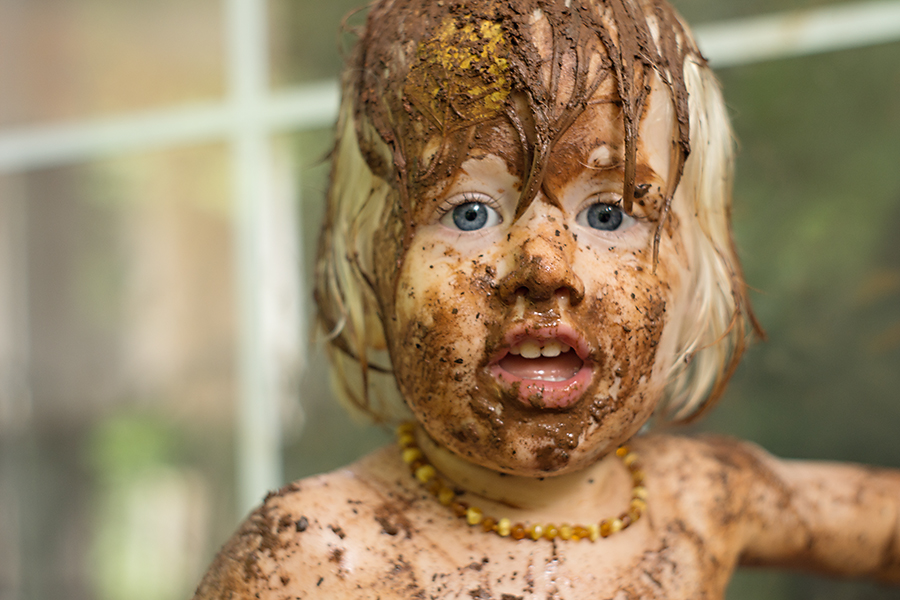
Yes, that is a leaf plastered in his hair. 🙂 It’s about 4pm so the sun isn’t super high but is still very harsh. He’s standing in just a tiny bit of open shade and facing out toward the sun. Despite the mud, he has a very even light on his face.
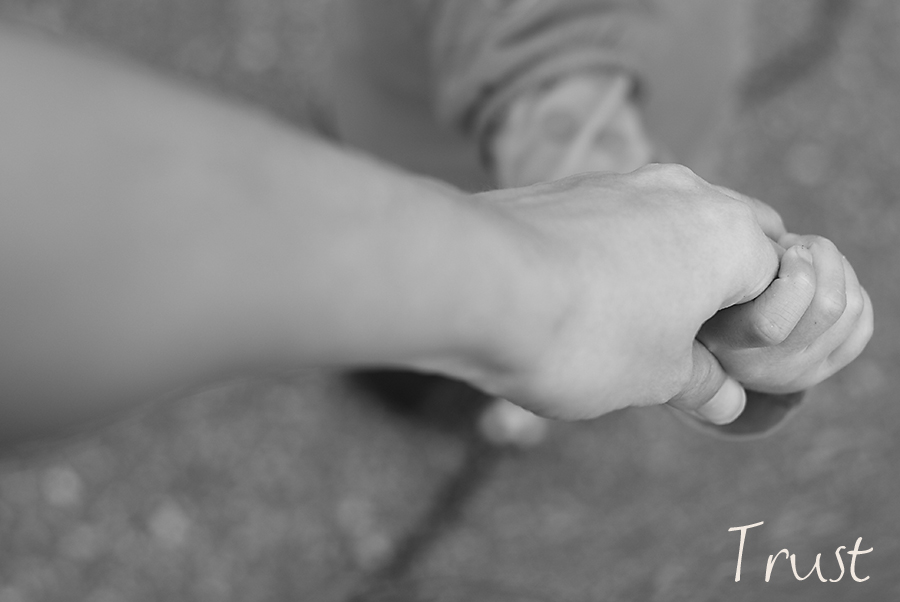
This image is taken right around noon. The sun is high above us producing a flat light on the parts of our hands facing up and deep shadowing underneath us. If you have to shoot during full sun and can’t find open shade, laying your subject on their backs looking up is a great option if the sun isn’t so bright that it causes squinting.
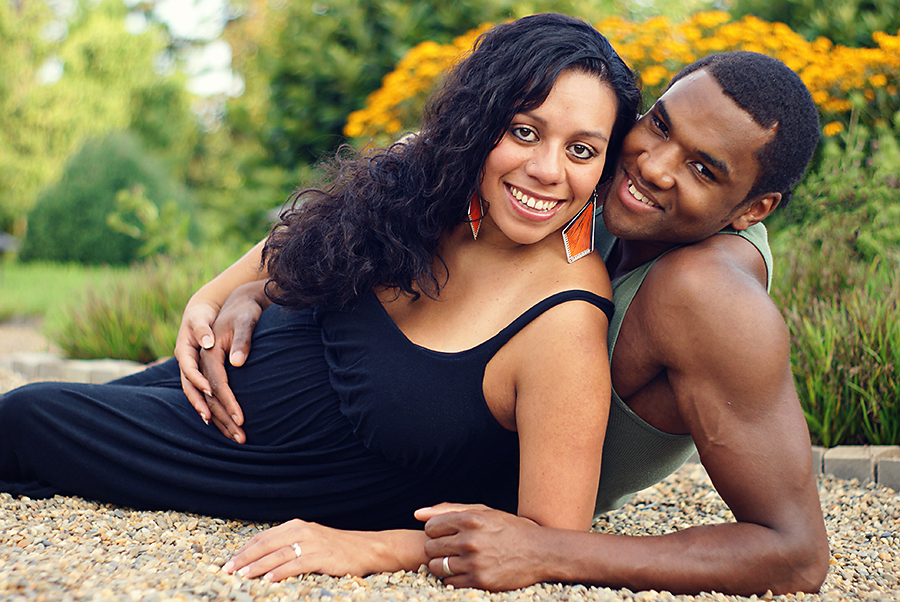
The light here is not fully front/flat. It’s coming from above my left shoulder as indicated by the shadowing on the man’s lower jaw. But all and all, this is mostly front lit.
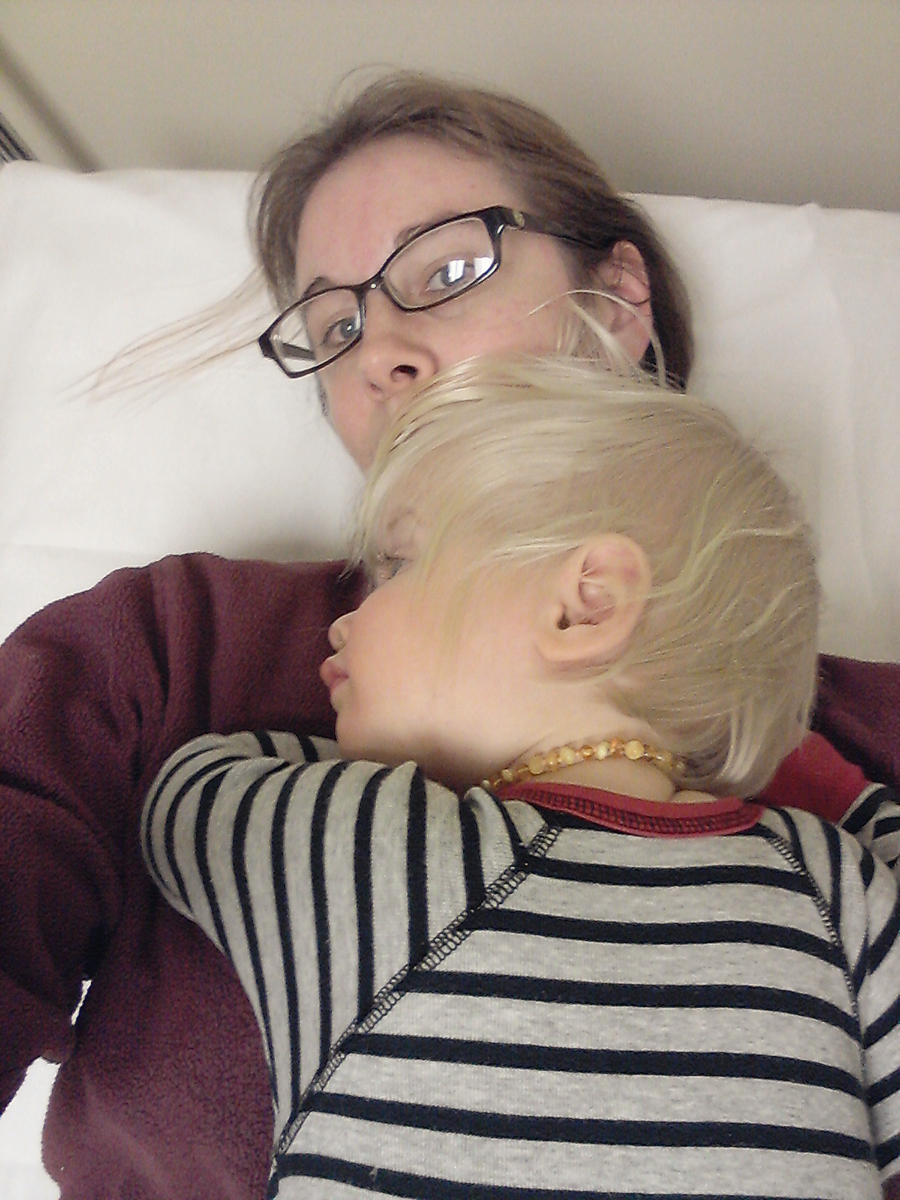
Sneaking in an old Instagram image of me and my baby boy at the clinic. He was so snuggly and feverish during this bout of RSV. As you can see from the reflection in my glasses, the light was directly above the two of us. This created even tones in his hair. You can see that I have turned my face just slightly so that the light is shading the far side of my face, making me slightly side lit.
Assignment
If you have questions or concerns, stick them in the comments and I’ll try to answer.
For a final lighting assignment, I’ll have you take a front, side, and back lit image along with an image or two of using lighting modification and available light. You can start working on that now, or you can wait until it’s ‘due’ as the lighting series finishes up. My goal throughout this series is mainly to get you to notice the lighting you’re using and learn when you may want to move your subject if possible.
23
2013Class Notes
If you’ve been with me since the beginning, I miss you in the Flickr Pool. However, it’s summer. Life is busy and vacations are happening. I get that. Don’t forget to jump in again when life slows down. I really can’t wait to see the summer fun you’ve captured with your lens when things start cooling off again!
If you’re new to my class, welcome! Jump in where ever you want and start posting in the Flickr Pool. Just label your assignment so we know how to give you critique 🙂
Here’s where I’m headed. The rest of the summer will likely be spent on studying using light. In September, we’ll be taking a break from assignments and studying a few informative areas of photography. This will be your chance to catch up and just keep practicing. In October, class members will choose a final project (woo hoo!!) and I’ll talk about photo perspectives with a few little assignments. In November and December, I’ll touch on beginning editing. And during January, I’ll be showcasing each of my students’ final projects (which hopefully ya’ll can get posted in between drinking eggnog and enjoying Christmas cookies).
Now this is a week of really quick definitions and then sweet but short little assignments. We’re studying the types of natural light and how they’re used primarily in portraiture
Full Sun
I typically think of the full sun hours as being between 9 am and 3 pm. The sun is high overhead, bright and harsh, and casts unflattering shadows across noses and eye sockets. Honestly, I try to avoid full sun at all costs: instead I seek out open shade. Truth be told: adventurous preschoolers sometimes make the search for open shade impossible.
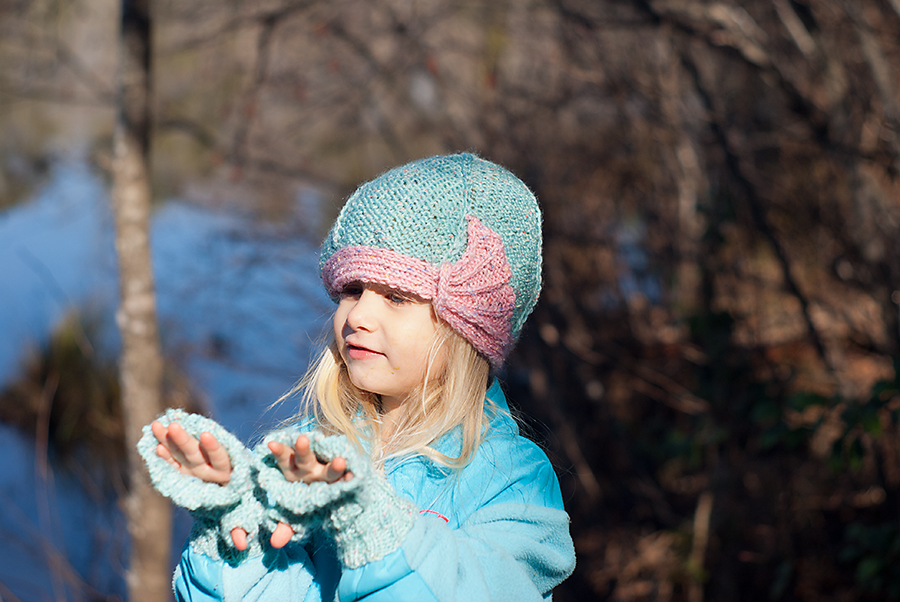
Here’s our little case study image. Do you see the deep shadows made by her hat, nose, and up under her hands? All those shadows are a result of the direct intense mid-day sun.
The best thing to do in Full Sun when you can’t find open shade is to look for natural light reflectors that will reflect light back into the subject’s face. Had I turned Aeralind to image left the lake behind her would have been reflecting light into her face to dissipate the shadows some. Natural light reflectors include water, concrete, and sand. If you wanted to modify the light with a purchased reflector that would work as well. Here’s a nice cheap reflector, but I’ve also used white poster board in a pinch! Again, we’ll go over the use of reflectors at a later point.
Full Sun Assignment
Take 1 photo in full sun. Do one of the following (or both for you overachievers):
- Use the shadows created in full sun to emphasize an aspect of your subject.
- Place your subject in such a way that a natural reflector is pushing light back into your subject. It might help to have an obedient subject who will patiently wait while you direct them in circles to find the best angle of reflection. Actually, images of annoyed husbands or wives would pretty much crack me up!
Shade
Open Shade
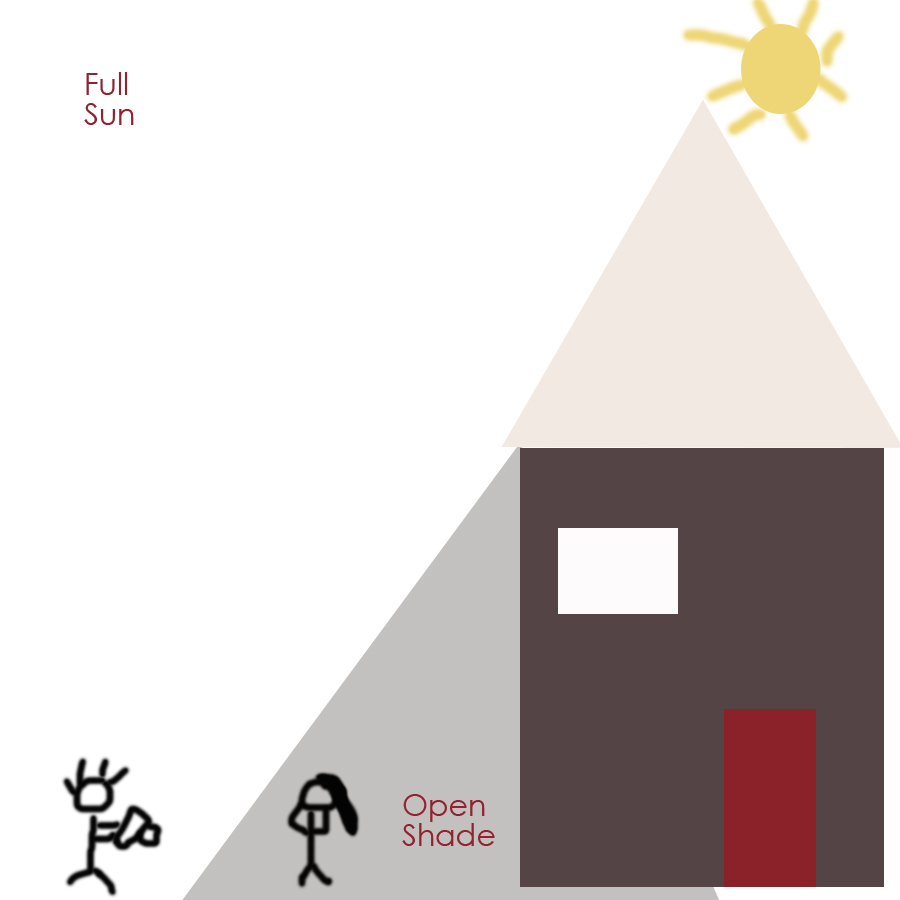
If I have to shoot during the day, I methodically hunt down open shade. Open shade is full shade, very near where the sun shines. Found under awnings or trees or the shadows of buildings, open shade is best used with a subject positioned so that they are side lit or front lit by the sun. Ready for my incredible graphic skills again? Here goes!
This would be where the photographer and subject would be positioned with either the subject facing fully into the light or turned at an angle to it. Got it?
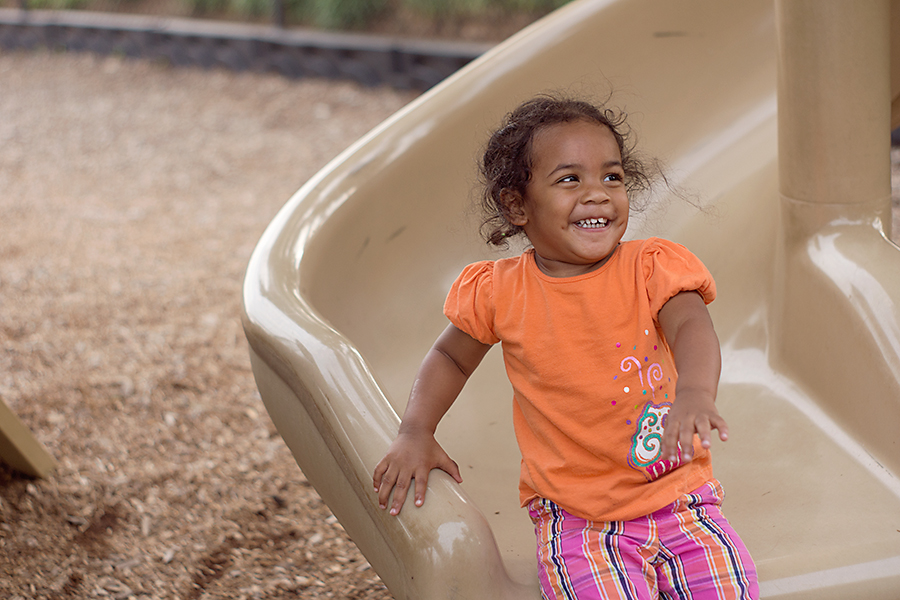
This is my niece Brooklyn (isn’t she a doll?) playing under the open shade of a twisty slide and facing out toward the sunny parts. She how she’s evenly lit without any harsh shadows. I love open shade during mid-day (or early evening as was the case here).
Beware of Dappled Shade
Open shade is fully covered. It’s ideal and often easy to find. Dappled shade is not ideal. Dappled shade is when light is filtering through shade-creating object. The best example of this is when sun filters through tree leaves. This type of shade produces some parts of the image having shaded light and some portions brightly lit by sunlight. Avoid this for portraits. Use it if you like for dramatic landscapes 🙂
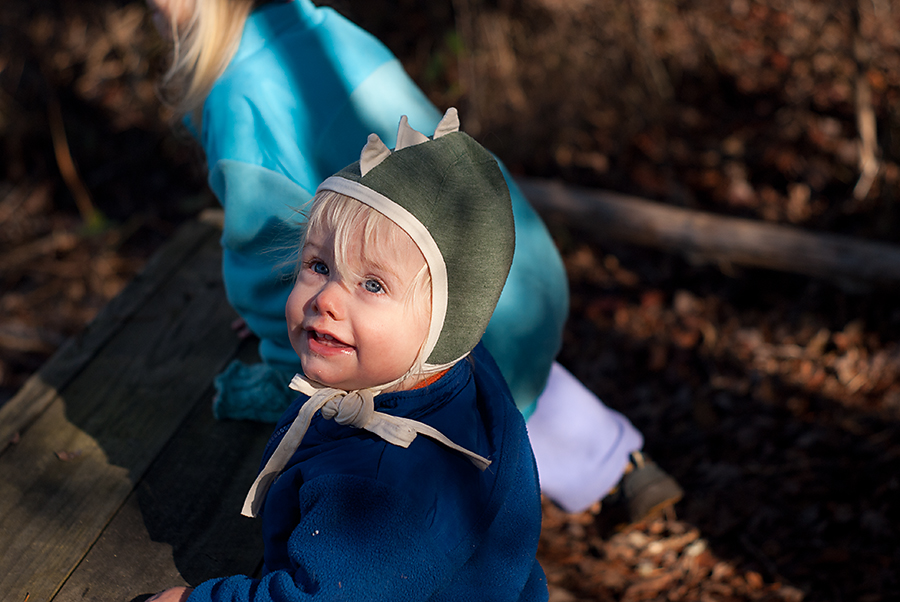
Dappled shade at it’s not so finest. Tree leaves filtering and it looks like a tree trunk across his sister’s back. 🙂
Open Shade Assignment
Find some open shade. Play around. Take some images. Enjoy! 🙂
Golden Hour
Golden Hour occurs twice a day: once about 30 minutes to an hour after sunrise and the second time about an hour an a half to an hour before sunset.
This light is magical. The sun is too low to produce dramatic shadows. The reds and pinks and oranges in the sky produce a lovely golden glow. It’s wonderful for back lit portraits and front lit portraits won’t find your subject squinting. I love everything about the Golden Hour.
Three images taken at Golden Hour on the same day (two by my husband who’s almost mastered the mechanics of manual mode and has no idea how to light images properly…. well, until after he reads this series :-p).
Enough said about golden hour. 🙂
Golden Hour Assignment
Go take images during one of the golden hour periods. Please try to post less than 10 images taken during golden hour, ok? I know it’s a hard task… enjoy that light though. It’s yummy.
Post all your images to the Quiet Graces Free Beginner Photography Class Flickr Pool and leave some critique for the others in the group! Can’t wait to see you begin to paint with light.
16
2013Over the course of the next couple weeks we’re going to learn about one of the key aspects of all photography: light. This post is going a definition of terms overview. It’s here for you to refer to when I use these terms but it’s also here to help you think about these different types of lighting as you’re taking your photos.
Lighting Types
Natural Light
Natural light is this overarching umbrella of photographers who use only the light available to them (and sometimes a reflector). When some photographers use this term, they literally mean the light is natural: coming from the sun, moon, or stars. I have included available light under this umbrella: meaning your light source might be a florescent or incandescent light bulb or even a computer screen 🙂
Full Sun
Full Sun is just what it sounds like. Full sun bearing down on your subject without shade. When most photographers think of full sun it’s between the hours of 10-3 or 4. The sun is high and harsh creating lots of shadows.
Open Shade
When Photographers use the term open shade, we’re referring to placing our subject in a large even shadow and facing them toward the sunlight or reflected light. This is a technique that makes shooting in full sun much less harsh. Dappled shade, or light filtering through something like tree leaves, has a quality of some shady spots and some spots of bright light. This is a far less desirable for portraits.
Available Light
Available light is the light we have available to us. Full sun and open shade both feature available light. Shooting a ballet using only the stage lights already present is using available light. Shooting your sleeping child in the bed next to you using only the light of your laptop is using available light. Available light imagery does not permit the use of light modifiers or flash. This entire course has a focus on available light.
Modified Light
Modified Light is light that a photographer either reflects using specific tools or creates through the use of on camera or off camera flash.
Reflector
A reflector is a white, silver, or gold instrument used to reflect available light into the shadowed areas of your image. You can purchase a ready made reflector for this purpose or you can use something simple like a white poster board or white wall/light cement (after placing your subject intentionally). In my newborn photography, I wear a white shirt to reflect light back to my babies and I sometimes have a parent hold up a burp cloth if I think the shadowed side of the baby needs an extra boost.
On Camera Flash
If you’re using an entry level DSLR/DSLT or a point and shoot (and most of you are), your camera comes equipped with on-camera flash. If your camera also has a hotshoe, you can place an additonal flash unit directly on top of the camera. Throughout this course I have discouraged the use of on-camera flash, but in an upcoming lesson I will show you how and when to use this tool.
Off Camera Flash
Off Camera Flash or lighting is just what you envision being used in a traditional portrait studio. We automatically think of umbrellas and flashes that pop out extra light when the photographer clicks the shutter release. But there are also big large white boxes with lights inside called softboxes. And there are lights that produce the same amount of light at all times called continuous lighting (which I use). I will not be covering off camera flash during this class. I’m have very little knowledge on this subject and most of you will likely never use off-camera flash.
Light Direction
One of the most important concepts in photography is paying attention to the direction of your light.
Front or Flat
When a soft light is in front of your subject, you’ll produce images with flat or even lighting. If the light is bright and harsh, you’ll find your subject squinting.
Side Lighting
Side lighting when used well produces beautiful shadows and depth to a photo. Photographers use side light from both 90 and 45 degrees in portraits (as well as the range between). I’ll be going over both of these in detail.
Back Lighting
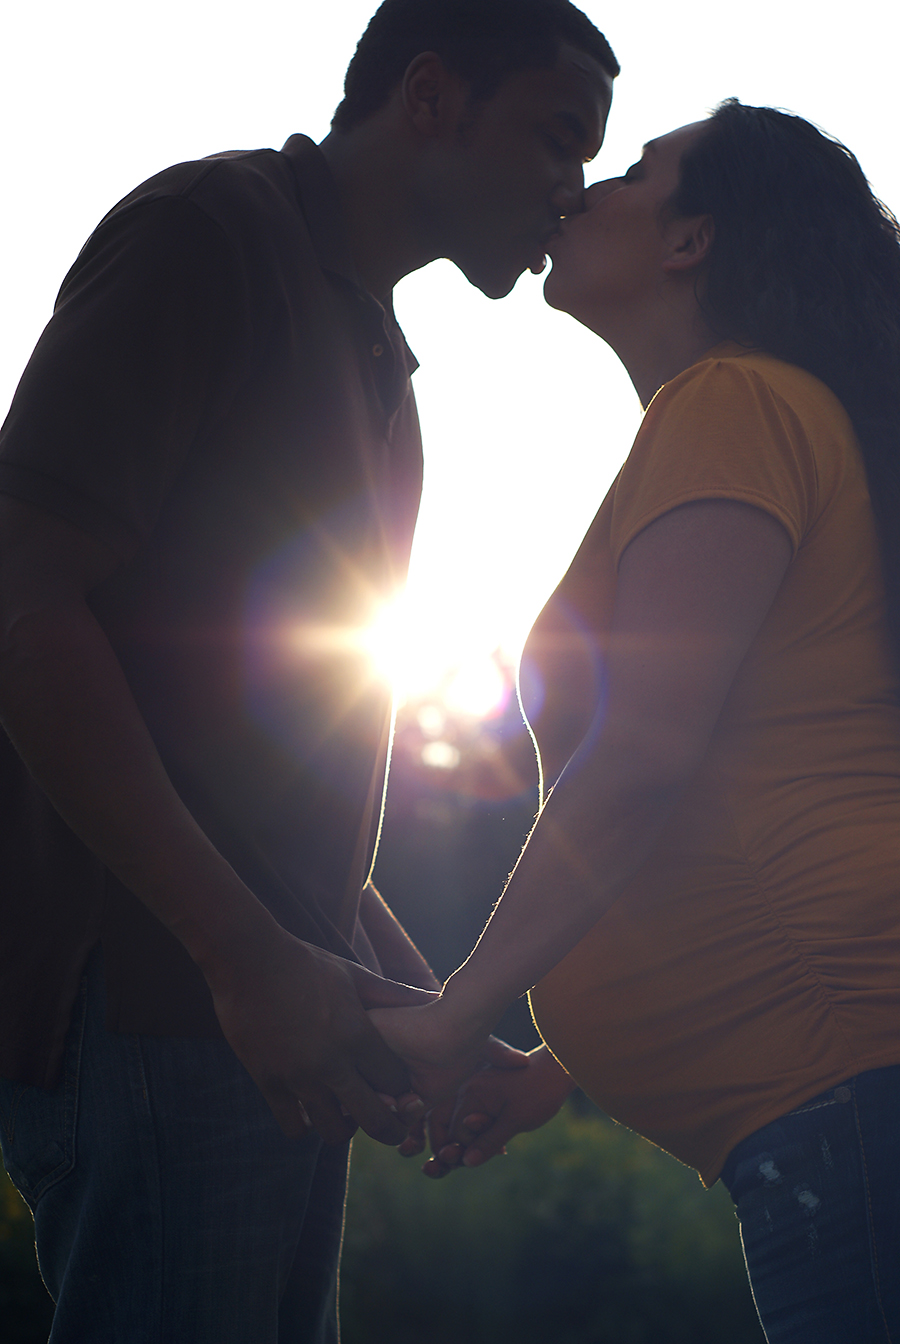
Back lighting is when the light source is coming from behind the subject. Backlighting produces yummy images with light streaming from behind or outlining your subject, but is very hard to expose for the skin of a portrait subject if you’re not using a large reflector to bounce light back toward your subject. Most back lit photos that are not silhouettes (like the one above) have a significant amount of work done to them in post processing unless a light modifier was used to make sure a portrait subject was not too dark.
Assignment
Real simple assignment this week. I want you to find some images you’ve already created (or take some new ones if you have time) that illustrate some of these lighting types. Upload a couple of your favorites to the Quiet Graces Free Beginner Photography Class Flickr pool and label it with the lighting type you think you used. Class members can give critique on the image itself and I’ll verify that you got the lighting type right. This is solely an exercise to get you seeing the light. 🙂
09
2013Today features a really technical post on how to nail exposure using your knowledge of stops and something called The Zone System. Again, if you like technical stuff, you’ll thrive off this post. If you don’t like technical stuff, read over it but feel free to keep clicking away until you figure it out on your own. The wonderful thing about digital photography is that you do have your LCD screen to check… the not so wonderful thing is that regardless of your choice of Film or Digital, time and the moment you’re shooting will still march on. Find the balance you can live with and go for it.
The Zone System
The Zone System was invented by Ansel Adams for use in film photography. It’s a system that assigns each color tone a stop value and aids the photographer in deciding what to set your exposure from. Ansel Adams pioneered this zone system in a time before color films was widely used and before digital photography was even dreamed up. That means that the world is seen in monochrome which is a little difficult for the modern photographer who is used to color. Let’s take a look at what each of these zones represent with tonality before diving into how to use the Zone system to nail exposure straight out of the camera.
The Tonality of the Zone System
| 1 | 2 | 3 | 4 | 5 | 6 | 7 | 8 | 9 |
Let’s talk real quick about what each color zone contains.
- Zone 1 is dark black. It renders as a smooth black with no texture in the final image.
- Zone 2 is a dark color recorded with the beginning of texture.
- Zone 3 is a dark color with average texture.
- Zone 4 is your average dark foliage, dark stone, shadows in portraits or in landscapes shot in sunlight.
- Zone 5 is dark colored skin, gray stone, average weathered wood tones, and your 18% gray card.
- Zone 6 is average Caucasian skin, light stone, or shadows on snow scapes.
- Zone 7 is very light skin, snow with side-lighting, and my son Sedryn’s crazy blond hair.
- Zone 8 are whites with texture, snow in the full shade, and highlights on average Caucasian skin.
- Zone 9 are glaring texture-less white subjects like snow in full flat sunlight or a white sheet of paper.
Read those again and get a feel for them. Ask yourself: what zone is a bronze statute? What zone is the sand on the beach? How about an orange tabby cat?
Using the Zone System to Set Exposure
The Zone System has us identify the area we’re most likely to loose detail or color when taking our shot. With digital cameras, we’re more likely to blow the highlights than lose detail in the shadowed or dark areas. So we’re always going to want to expose for the highlight that we don’t want to lose detail in. If you’re shooting film, it’s the opposite, you’ll want to expose for the shadowed area that you don’t want to lose detail in.
Remember our good old gray card and 18% gray? That’s zone 5 or middle grey. Remember how your camera meter is always straining to set the average exposure of your scene at 18% gray or Zone 5? If you’re shooting a scene with average contrast, your camera will likely do fine in auto mode. But try to photograph the detail in snow or coal and you’ll be cursing your camera in auto mode for turning both of those things into a Zone 5 middle gray. Or photograph an extremely varied scene and you’ll blow all your highlights in digital photograph and lose all your shadow detail in film photography. Let’s explore how the zone system helps with those two areas.
Photographing snow. What zone is snow? (look up at the chart) It’s Zone 8 in even diffused light. Your camera is trying to turn all that brightness into a Zone 5 essentially underexposing for the way you want the image represented. So you’ll look at your settings for an EV of 0 and move Zone 8 minus Zone 5= 3 Stops toward overexposure/positive EV. Bam! Quick exposure decision. (though it may take you awhile before you memorize what constitutes a stop…some days I still have to consult a chart for aperture)
Photographing coal or a dark night sky. What zone is the coal? It’s Zone 2 or 3. So you’re going to roll that exposure down 5 minus 2 or 5 minus 3 Zones or 2-3 stops toward underexposure/negative EV to capture all that detail in the darkness without overexposing it.
You sort of getting a feel for this? What complicates things is when you have a scene like Ansel Adams was so fond of with lots of white highlights and lots of shadow details. Digital users will always attempt to expose for the brightest highlight you want detail to be recorded in. Film users will attempt to expose for the darkest shadow area that you want detail in. The system isn’t perfect, and no matter what the image you’ll record, you may still need to put a high contrast image through editing software (or send film to a film lab with experience in push processing film to bright out highlights and dodging and burning prints to get the best print). However, knowing this system is going to give you the best possible negative to create your final print, especially if digital users shoot RAW files.
Zone System Case Studies
Let’s spend a few minutes doing a case study on how to use the Zone System. I’ll show you the images in both color and black and white so that you can begin to see the world in the monochromatic tonality of the Zone System and talk you through why I’m choosing to expose for a certain zone. In these images, I’m shooting digital so I’ll want to expose in a way that favors the highlights. If you’re shooting film, remember you’d want to expose for the shadows.
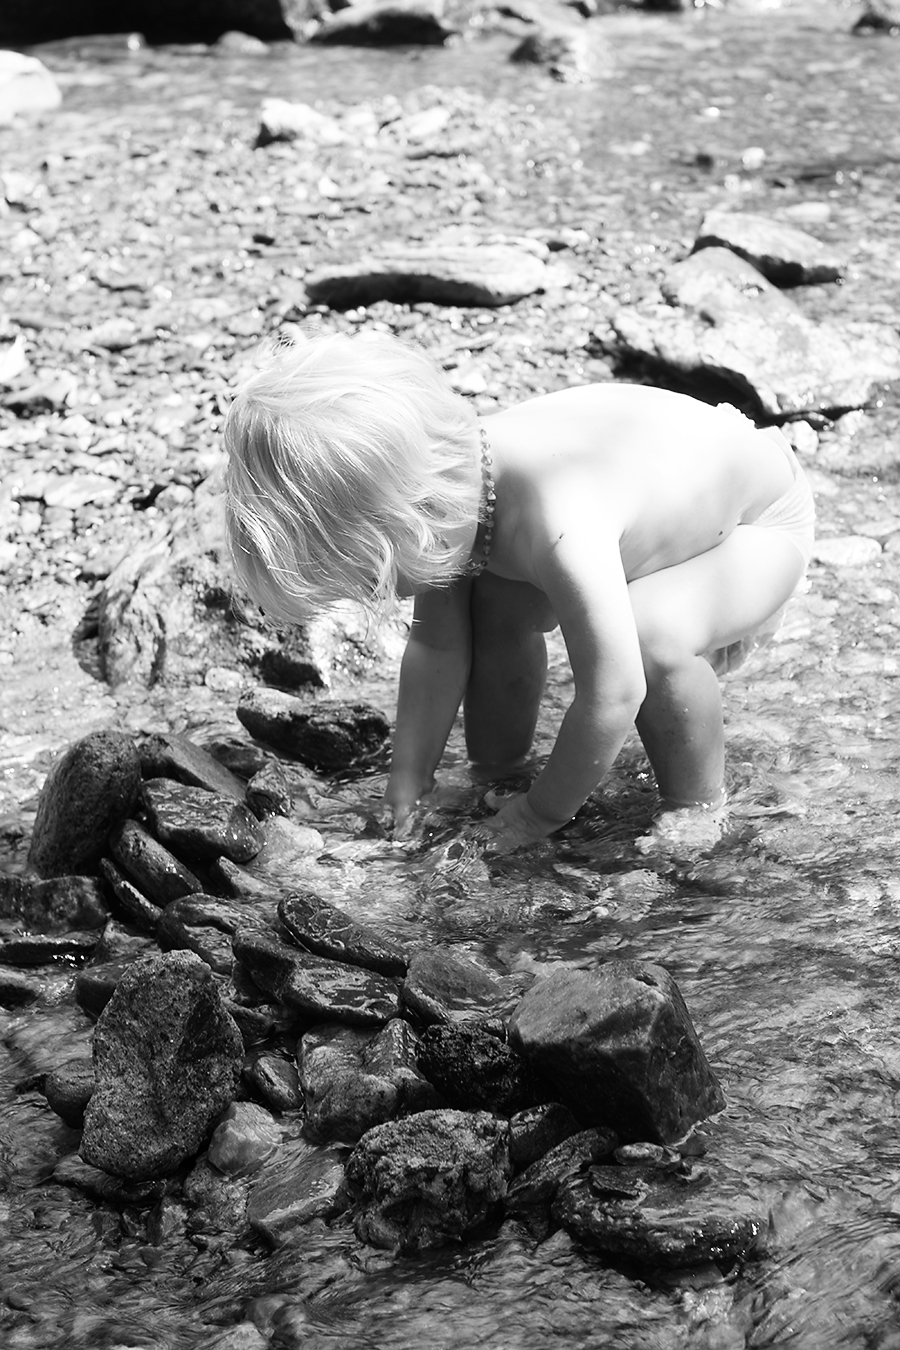
Case 1: Baby Boy in the River
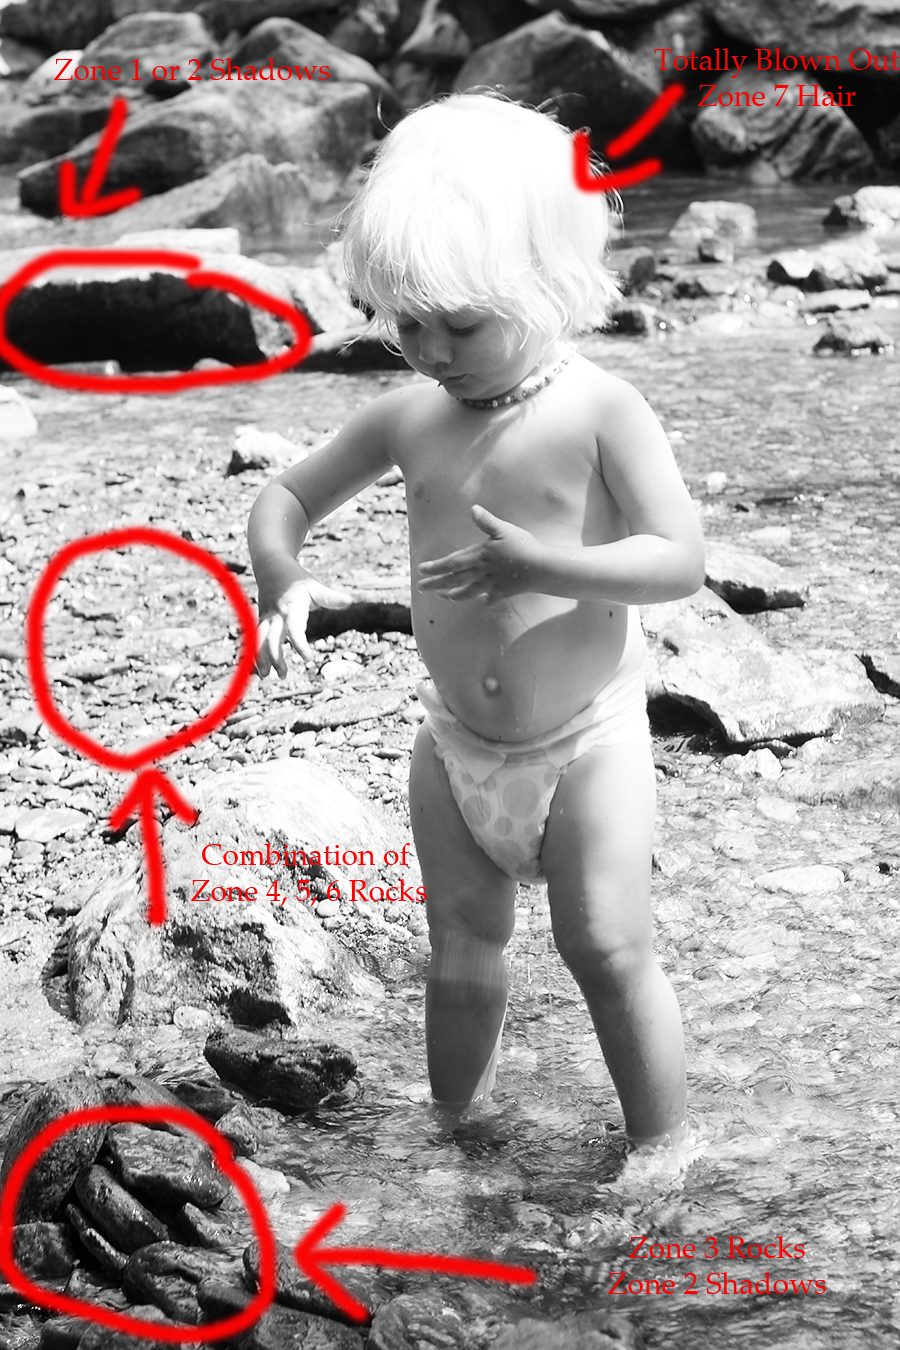
Here’s my first photograph of my son playing in heavily contrasted light set at EV 0 according my 18% gray loving camera meter.
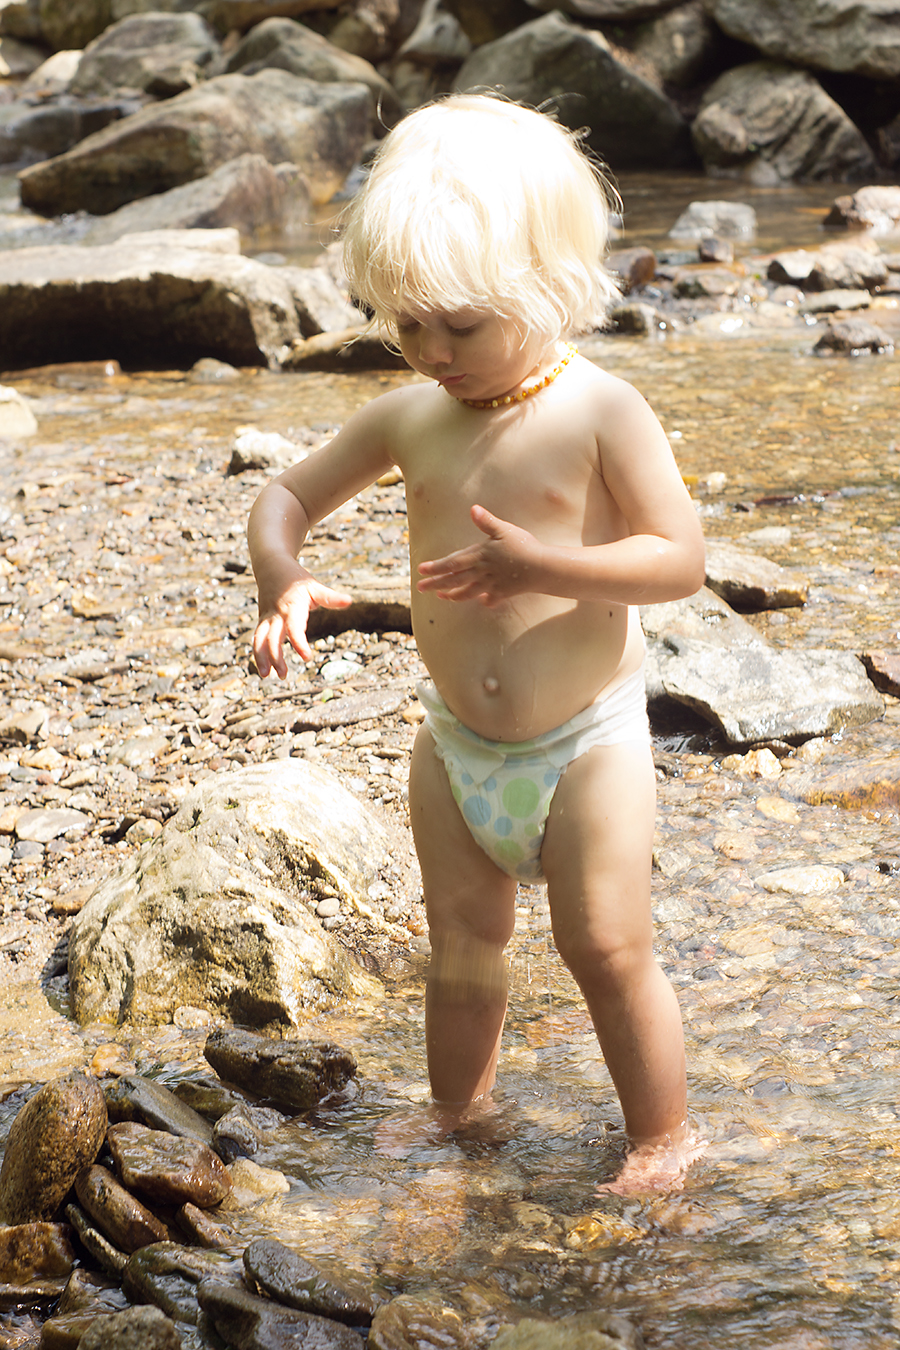
I shot black and white film for so many years before even picking up a digital camera and using color that I can naturally see the world in this black and white tonality of the Zone System. But as you can see in the color image, you really can see these zones in color as well. Even though Sedryn’s hair is more cream in the color image than bright white, you can still see how there is no detail and that Zone 7 is completely blown out.
On my second image, I adjusted my settings to be about 1.3 stops under exposed. I wish I had gone at least a full 2 to guarantee all my Zone 8 highlights wouldn’t be blown. You can see I did blow out the Zone 8 highlights on his very fair skin even in this image: right there around his shoulder and back in the harsh evening sun. However, underexposing (according to my light meter) just this much brought back all the detail in his hair. Overall, this an image with rich contrast across almost all 10 zones.
Is the Zone System Irrelevant with Current Technology Advances?
Light meters in modern cameras are more sophisticated than those used in Ansel Adam’s day. They are multi-segmented and attempt to balance the light across the image out; that’s why shooting in Auto mode with a modern digital camera often produces satisfactory results. Many photographers think digital photography brings about the death of the Zone System; I am not one of those photographers.
As I mentioned before, I do not like math… but I do like science and every single one of my hobbies require the math part of science. If I don’t cut or piece a quilt top exactly there will be wonky spots. If I don’t check my gauge when I’m knitting then my result could be wildly bigger or smaller than expected. For me the zone system is a system of measurement that’s super helpful when I’m outside with a highly contrasted scene. I’d rather lean on it than spend a lot of time fiddling with taking a shot and then looking at my LCD and then readjusting repeatedly to get the image I envisioned.
Yet at the same time, I’m not going to say that this system will work for every photographer. If the math of stops and the identifying of zones sort of blows your mind, then this isn’t the system for you. Be critical about what works for you. You’ve grown enough in your skills and should be progressing your way through conscious (although maybe a bit slow) competency of manual mode.
Wrapping up Manual Mode and a Quick Assignment
This week is my last post on manual mode. I’m hoping your well on your way to understanding setting your own exposure and are able to navigate manual mode with a bit of growing confidence.
Your assignment this week is to leave me a comment here about: What are you understanding? What are you struggling with? What would you like clarified? What helped you the most? If there are enough questions, I’ll address them in a seperate FAQ Manual Mode Post. If not, I’ll make a point to answer each of you in the comments. I’m so looking forward to hearing from you and I hope to see your images in the Quiet Graces Free Beginner Photography Class Flickr Pool very soon!
